UserActivationについて
はじめに
12月1日から25日まで、毎日1記事ずつ公開していくアドベントカレンダー企画です。
この連載では、Web標準とDDDについて学びを深めていきます。
第10回は「UserActivation」がテーマです。
UserActivationとは何か、実際どのように実装するのかを学んでいきます。
UserActivationとは
UserActivationは、ユーザーによる有効化に関する情報を取得できるAPIです。
ユーザーによる有効化とは、ユーザーがページを読み込んでから実際に操作を行ったか、または操作が完了しているかを表します。具体的には、ボタンのクリックなどの操作が該当します。
ユーザーによる有効化には以下の2つの状態があります:
- Transient activation: ユーザーが現在ページを操作している状態
- Sticky activation: ページを読み込んでから一度はページを操作した状態
次の例では、ページを開いた直後にダイアログが自動的に開くことをUserActivationを使って防ぎ、ユーザーの明示的な操作を検知してダイアログを開く実装を行いました。
UserActivationの実装例
動作の流れ
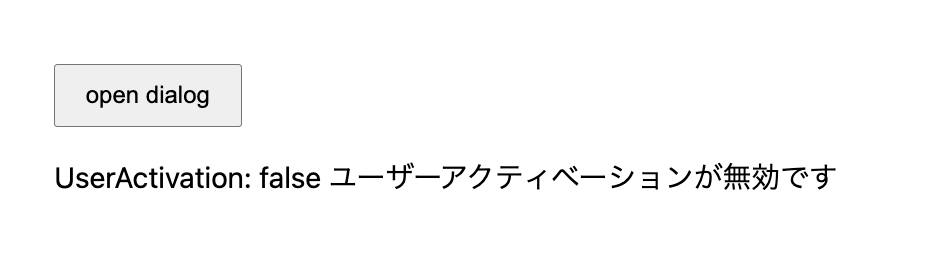
- ページを開いた時点ではユーザーの操作がないため、
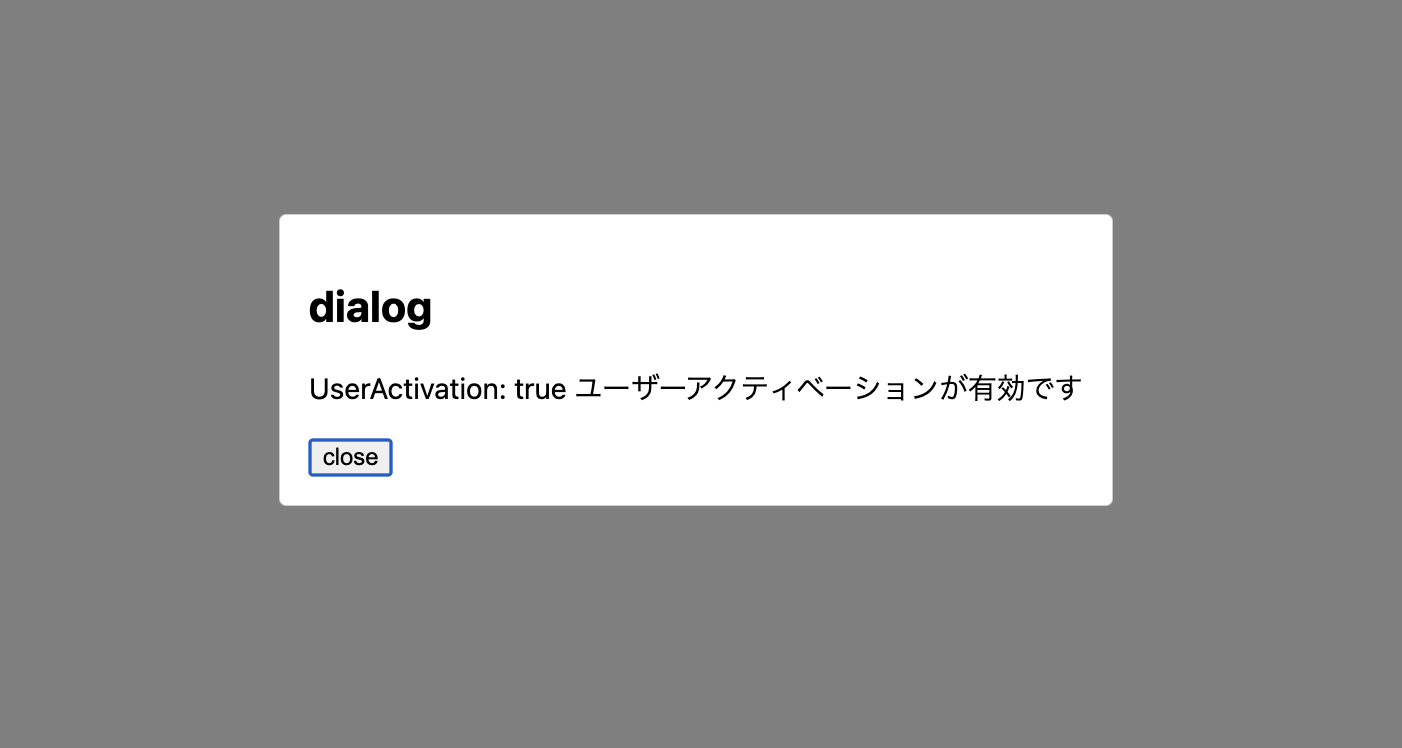
userActivation.isActiveがfalseとなり、setTimeout()内のダイアログは開かない - 「open Dialog」ボタンを押下すると、ユーザーの操作を検知して
userActivation.isActiveがtrueになり、openDialog()でダイアログが開く
ページを開いた時の画面(ユーザーが何も操作していない状態)
open Dialogボタンを押してダイアログを開いた時の画面
<html>
  <head>
    <title>UserActivation</title>
  </head>
  <body>
    <button id="openBtn">open dialog</button>
     <p id="userActivationResult"></p>

    <dialog id="myDialog">
      <h2>dialog</h2>
      <p id="userActivationResultDialog"></p>
      <button onclick="document.getElementById('myDialog').close()">close</button>
    </dialog>
  </body>
</html>
<script>
  const result = document.getElementById('userActivationResult');
  const dialog = document.getElementById('myDialog');
  const resultDialog = document.getElementById('userActivationResultDialog');
  document.getElementById('openBtn').addEventListener('click', openDialog);

  // ボタン押下時はユーザー操作により有効化されるため、ダイアログを開くことができる
  const openDialog = () => {
      if (navigator.userActivation.isActive) {
        try {
          dialog.showModal();
          resultDialog.textContent = `UserActivation: ${navigator.userActivation.isActive} ユーザーアクティベーションが有効です`;
        } catch (e) {
          console.error('Failed to open dialog:', e);
        }
      }
    }

  // ページ読み込み後1秒待機し、ユーザー操作がなければダイアログは開かない
  setTimeout(() => {
    if (navigator.userActivation.isActive) {
      dialog.showModal();
    } else {
      result.textContent = `UserActivation: ${navigator.userActivation.isActive} ユーザーアクティベーションが無効です`;
    }
  }, 1000);
</script>
<style>
  body {
    font-family: system-ui, sans-serif;
    padding: 2rem;
  }

  #openBtn {
    padding: 8px 16px;
    cursor: pointer;
  }

  #userActivationResult {
    margin-top: 1rem;
  }

  #myDialog {
    padding: 1rem;
    border: 1px solid #ccc;
    border-radius: 4px;
  }

  #myDialog::backdrop {
    background: rgba(0, 0, 0, 0.5);
  }
</style>
まとめ
今回はUserActivationについて紹介しました。
ユーザーの操作を検知することで、意図しないダイアログの表示などを防ぐことができます。
これにより、UXを向上させ、より安全なWebアプリケーションを構築できます。
参考
https://developer.mozilla.org/ja/docs/Web/API/UserActivation https://developer.mozilla.org/ja/docs/Glossary/Transient_activation https://developer.mozilla.org/ja/docs/Glossary/Sticky_activation